Are you ready to discover the secret to vibrant hair with our guide on how to make rosemary oil for hair? Follow the aromatic trail of this natural elixir and unlock a world of nourishment, strength, and beauty for your hair.
In the pursuit of vibrant and luscious locks, the world of hair care has seen a shift towards natural remedies, and one age-old secret stands out: rosemary oil.
A symbol of remembrance and vitality, rosemary not only graces our culinary creations but also holds a special place in the realm of hair care.
The allure of chemical-free solutions and a desire for healthier, stronger hair have ignited interest in creating rosemary oil right in the comfort of our homes.
On this page, we will dive into the art of crafting your own rosemary oil for hair, unveiling its myriad benefits and guiding you through the steps to unlock its natural goodness.
Say goodbye to harsh chemicals and welcome the rejuvenating touch of rosemary oil – an elixir for your hair’s ultimate transformation.
Benefits of Rosemary Oil for Hair
The enchanting aroma and remarkable properties of rosemary oil extend far beyond its culinary uses. When it comes to hair care, this fragrant herb offers a treasure trove of benefits that have been cherished for centuries.
Scientifically backed and time-tested, here are some of the ways rosemary oil can work wonders for your hair:
1. Stimulates Hair Growth: The potent compounds within rosemary oil, such as ursolic acid, promote blood circulation in the scalp. This enhanced circulation delivers essential nutrients to hair follicles, awakening dormant ones and encouraging the growth of new, strong strands.
2. Strengthens Hair Follicles: Rosemary oil is rich in antioxidants that combat free radicals. By safeguarding hair follicles from oxidative stress, it strengthens them, reducing hair thinning and promoting healthier, more resilient hair.
3. Reduces Hair Loss: Thanks to its ability to balance hormones and inhibit the production of dihydrotestosterone (DHT), a hormone linked to hair loss, rosemary oil can help diminish excessive shedding and prevent premature hair fall.
4. Combats Dandruff and Scalp Irritation: With its antimicrobial and anti-inflammatory properties, rosemary oil soothes an itchy scalp and addresses dandruff issues. Maintaining a balanced scalp environment supports overall hair health.
5. Delays Premature Graying: The antioxidants present in rosemary oil not only protect against hair thinning but also delay the onset of premature graying, allowing you to flaunt your natural hair color for longer.
6. Adds Shine and Luster: Rosemary oil’s ability to stimulate hair follicles and improve circulation leads to healthier hair overall. This vitality is reflected in the shine and luster it imparts, transforming dull locks into a glossy, head-turning crown.
Step-by-Step Guide on How to Make Rosemary oil for Hair

Creating your own rosemary oil for hair is a rewarding and straightforward process that allows you to experience the full potency of this botanical marvel.
Whether you’re a DIY enthusiast or a novice in the world of herbal concoctions, follow these steps to craft your very own rosemary-infused oil:
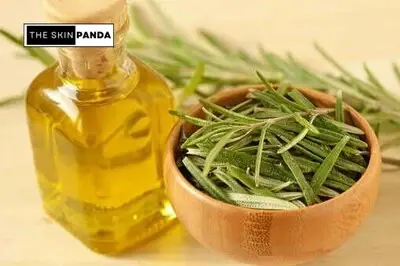
Step 1: Choose Quality Rosemary
Embarking on your journey to create nourishing rosemary oil begins with selecting the finest rosemary leaves.
The quality of the rosemary you choose sets the foundation for the potency and effectiveness of your infused oil. Here’s how to ensure you pick the best rosemary for your hair care elixir:
Fresh or Dried:
1. Opt for fresh rosemary if available, as it retains its vibrant color, aroma, and essential oils. Fresh rosemary leaves are pliable and have a vivid green hue.
2. If fresh rosemary is not accessible, dried rosemary is an excellent alternative. Look for dried leaves that maintain their color and haven’t lost their fragrance.
Appearance and Aroma:
1. Examine the rosemary leaves closely. They should be free from blemishes, discoloration, and signs of decay.
2. Gently crush a small portion of the rosemary leaves between your fingers. The aroma should be robust and invigorating, releasing the characteristic pine-like scent that defines rosemary.
Organic and Pesticide-Free:
1. Whenever possible, choose organic rosemary to avoid any potential exposure to harmful pesticides or chemicals.
2. Organic rosemary ensures that the oil you create is as pure and natural as possible, aligning perfectly with the holistic approach of homemade hair care.
Harvest Time:
1. If you have access to a rosemary plant, consider harvesting your own leaves. The optimal time to harvest rosemary is in the morning when the essential oil content is at its highest.
2. Select young, tender stems for the best concentration of aromatic oils.
Step 2: Prepare the Rosemary
Once you’ve chosen the perfect rosemary leaves, it’s time to prepare them for the infusion process. This step ensures that the rosemary releases its aromatic oils and active compounds into the carrier oil, maximizing the benefits for your hair.
Follow these simple steps to prepare the rosemary for your homemade oil:
For Fresh Rosemary:
Gently pluck the rosemary leaves from the stems. Hold the stem with one hand and use the other to slide your fingers down the stem, removing the leaves in the process.
Discard any tough or woody stems, focusing on the tender leaves.
For Dried Rosemary:
Measure out the desired amount of dried rosemary leaves, typically around 1/2 cup. This quantity can be adjusted based on the size of your glass jar and the strength of infusion you desire.
Crush the dried leaves slightly using your fingers or a mortar and pestle. This helps to break down the leaves and release their essential oils.
Crushing the Leaves:
Gently crushing the leaves helps to expose more of the surface area to the carrier oil, facilitating the infusion process.
Be cautious not to crush the leaves too aggressively, as you don’t want them to turn into a fine powder.
Properly preparing the rosemary ensures that its essential oils and beneficial compounds are ready to infuse into the carrier oil.
This step sets the stage for creating a potent rosemary oil that will become a cornerstone of your hair care routine.
Step 3: Select a Carrier Oil
Choosing the right carrier oil is pivotal to creating a well-balanced and nourishing rosemary-infused oil. Carrier oils provide the base for the infusion, carrying the beneficial properties of the rosemary to your hair and scalp.
Here’s how to make an informed choice when selecting your carrier oil:
Consider Hair Type:
1. Olive Oil: Ideal for most hair types, olive oil is deeply moisturizing and rich in antioxidants. It helps tame frizz and adds shine.
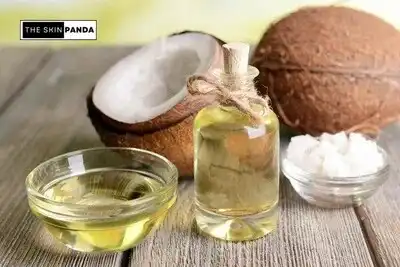
2. Coconut Oil: Great for dry and damaged hair, coconut oil penetrates hair shafts and imparts hydration and strength.
3. Jojoba Oil: Excellent for oily or combination hair, jojoba oil closely resembles the natural sebum produced by the scalp. It balances oil production and promotes overall hair health.
Texture and Absorption:
Think about the texture of the carrier oil. Lighter oils like jojoba and grapeseed are easily absorbed and don’t leave a heavy residue, making them suitable for daily use.
Thicker oils like olive and coconut oil provide intense moisture and are better suited for occasional deep treatments.
Additional Benefits and Personal Preference:
Some carrier oils have their own unique benefits. For instance, argan oil is rich in vitamin E and promotes hair elasticity, while sweet almond oil adds a luxurious softness to hair.
Your own preferences play a role. If you enjoy the scent and feel of a particular carrier oil, it will enhance your overall experience.
Step 4: Combine Rosemary and Carrier Oil
With your chosen carrier oil in hand, it’s time to merge the aromatic essence of rosemary with the nurturing base of the carrier oil.
This pivotal step sets the stage for infusing the oil with the rich properties of the herb. Follow these steps to seamlessly combine rosemary and carrier oil:
Materials Needed:
- Fresh or dried rosemary leaves
- Your selected carrier oil (e.g., olive oil, coconut oil, jojoba oil)
- Clean, dry glass jar with a tight-fitting lid
Instructions:
1. Prepare the Jar: Ensure that your glass jar is clean and dry. Any moisture in the jar could lead to spoilage.
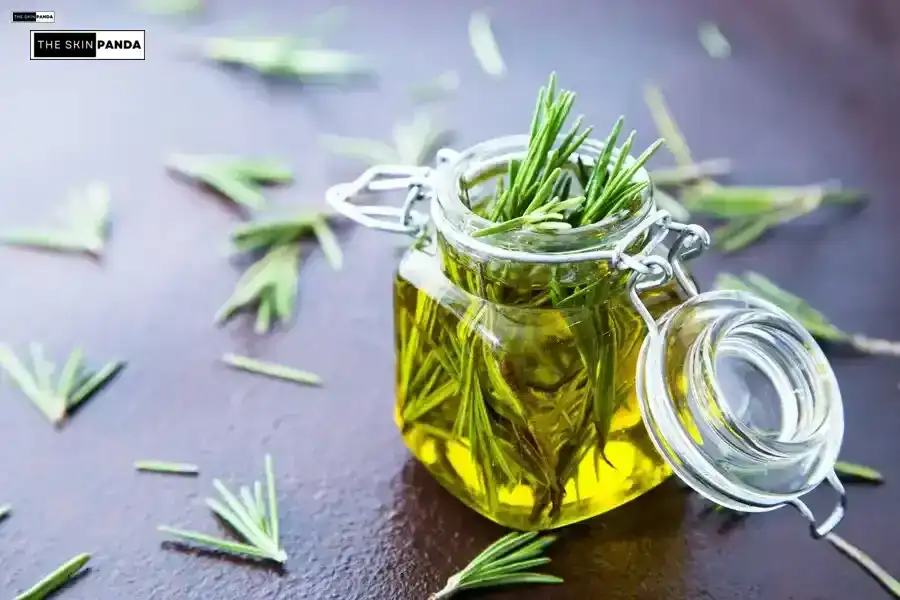
2. Add Rosemary: If using fresh rosemary, gently pluck the leaves from the stems and place them into the glass jar. If using dried rosemary, measure out the desired amount and add it to the jar.
3. Introduce Carrier Oil: Pour your chosen carrier oil over the rosemary leaves in the jar. Make sure that the rosemary is fully submerged in the oil. Leave a small space at the top of the jar to prevent any overflow during the infusion process.
4. Seal the Jar: Securely close the jar with the tight-fitting lid. This prevents air and moisture from entering, which could potentially compromise the quality of the oil.
5. Gently Agitate: Give the jar a gentle shake or swirl to ensure that the rosemary and carrier oil are evenly combined.
6. Label and Date: It’s a good practice to label the jar with the contents (rosemary-infused oil) and the date of preparation. This helps you keep track of the infusion period.
Step 5: Choose an Infusion Method
Now that you’ve combined the rosemary and carrier oil, it’s time to initiate the infusion process. This step involves allowing the aromatic compounds of rosemary to infuse into the carrier oil, creating a potent elixir for your hair.
There are two main methods to choose from: the cold infusion method and the heat infusion method. Select the one that suits your time frame and preferences:
Cold Infusion Method:
1. Place the sealed glass jar containing rosemary and carrier oil in a spot that receives ample sunlight. This could be a windowsill or a sunny corner of your kitchen.
2. Allow the jar to sit undisturbed for about 2 to 4 weeks. The sun’s warmth will gently coax the essential oils from the rosemary into the carrier oil.
3. During this time, you may notice the oil taking on a faint green hue, as well as a growing aroma of rosemary.
Heat Infusion Method:
1. Fill a larger pot with water and bring it to a gentle simmer.
2. Place the sealed glass jar containing the rosemary and carrier oil into the simmering water, making sure the water level is below the jar’s lid.
3. Allow the jar to sit in the warm water for about 1 to 2 hours, ensuring the heat remains low to prevent overheating the oil.
4. After the allotted time, carefully remove the jar from the water and let it cool before handling.
Choosing the Right Method:
Cold Infusion: This method is excellent for those who have time to spare and want a gradual, gentle infusion process. It’s particularly effective in retaining the delicate aromatic compounds of rosemary.
Heat Infusion: If you’re pressed for time or prefer a quicker infusion, the heat method is more suitable. However, be cautious not to overheat the oil, as excessive heat can degrade the oil’s quality.
Step 6: Strain and Store
As the infusion period comes to an end, it’s time to prepare your rosemary-infused oil for application. This step involves separating the infused oil from the rosemary leaves and ensuring proper storage for long-lasting freshness and efficacy. Here’s how to perfectly strain and store your homemade elixir:
Materials Needed:
Fine mesh strainer or cheesecloth
Clean glass jar with a tight-fitting lid
Instructions:
1. Strain the Oil: Place the fine mesh strainer or a piece of cheesecloth over a clean glass jar. Carefully pour the infused oil through the strainer to separate it from the rosemary leaves. The strainer will catch any leftover plant material, resulting in a smooth oil.
2. Press Gently: To extract every precious drop of infused oil, gently press the rosemary leaves against the strainer or cheesecloth using the back of a spoon. This helps release any remaining oil that might be trapped in the leaves.
3. Discard the Leaves: Once you’ve extracted all the oil, you can compost or discard the spent rosemary leaves.
4. Seal and Store: Seal the glass jar containing the strained rosemary-infused oil with a tight-fitting lid. This prevents any air from entering and helps maintain the oil’s potency.
5. Choose the Right Location: Store the jar in a cool, dark place away from direct sunlight and moisture. A pantry or cupboard is an ideal location.
6. Label and Date: Label the jar with the contents (rosemary-infused oil) and the date of creation. This way, you can keep track of its freshness and potency.
Step 7: Optional Additions
Elevate your rosemary-infused oil with a touch of personalization by considering optional additions.
These extra ingredients not only enhance the fragrance but also bring additional benefits to your homemade elixir.
Here’s how you can experiment with optional additions to create a tailor-made hair care experience:
Essential Oils:
Lavender Oil: Known for its calming properties, a few drops of lavender oil can promote relaxation and create a soothing scent in your rosemary-infused oil.
Cedarwood Oil: Cedarwood oil has been associated with improving hair growth and reducing hair loss. Its warm, woody aroma complements the herbal scent of rosemary.
Tea Tree Oil: Adding a few drops of tea tree oil can enhance the oil’s antimicrobial properties, making it an excellent choice for those with dandruff or scalp issues.
Instructions:
1. Select Your Essential Oil: Choose an essential oil based on its benefits and the fragrance you desire. Remember that essential oils are potent, so a few drops go a long way.
Add to Infused Oil: Once you’ve strained the rosemary leaves from the carrier oil, add 5-10 drops of your chosen essential oil to the infused oil. Adjust the quantity based on your preference and the oil’s strength.
Mix Gently: Seal the jar containing the infused oil and essential oil and gently shake it to mix the oils evenly.
Allow to Settle: Let the oil sit for a day or two to allow the essential oil to blend harmoniously with the rosemary-infused oil.
Benefit from the Blends:
Lavender, cedarwood, and tea tree oils bring their unique attributes to the mix, enriching your rosemary-infused oil with additional therapeutic properties and an aromatic twist.
Caution:
Essential oils are concentrated and can cause irritation if not properly diluted. Always perform a patch test before using a new essential oil, and follow recommended dilution ratios.
Experimenting with optional additions allows you to customize your rosemary-infused oil to cater to your specific hair care needs and sensory preferences.
These additional ingredients add a delightful touch to your homemade elixir, transforming it into a holistic hair care treasure that’s uniquely yours.
Step 8: Application and Storage
With your freshly prepared rosemary-infused oil in hand, it’s time to indulge your hair in its nurturing embrace.
Applying the oil correctly and storing it properly ensures you reap the full benefits of this natural elixir. Here’s how to make the most of your rosemary-infused oil:
Application:
Warm the Oil: Before application, warm a small amount of the rosemary-infused oil. You can do this by placing the sealed jar in a bowl of warm water for a few minutes. Warm oil is more comfortable to apply and facilitates better absorption.
Massage the Scalp: Gently part your hair and apply the warmed oil directly to your scalp. Use your fingertips to massage the oil in circular motions. This stimulates blood circulation, promoting nutrient delivery to hair follicles.
Distribute Through Hair: Once you’ve massaged the scalp, spread the oil along the length of your hair, focusing on the ends. The nourishing properties of the oil will help condition and strengthen your hair strands.
Wrap Your Hair: To maximize the oil’s benefits, cover your hair with a shower cap or a towel. This traps heat and enhances absorption.
Application Duration:
For optimal results, leave the rosemary-infused oil on your hair for at least an hour. For a more intensive treatment, you can leave it on overnight.
Washing Out:
Shampoo and Conditioner: After the desired duration, wash your hair with a gentle shampoo to remove the oil. Follow up with a conditioner as usual.
Rinse Thoroughly: Ensure you rinse your hair thoroughly to remove any excess oil. You’ll notice the softness and shine that the rosemary-infused oil imparts.
Storage:
Dark and Cool: After each use, tightly seal the jar containing the remaining rosemary-infused oil. Store it in a cool, dark place away from direct sunlight and moisture.
Shelf Life: Homemade rosemary oil can last up to six months to a year, depending on factors such as the carrier oil used and storage conditions.
Step 9: Wash and Enjoy
As you embark on your journey of using rosemary-infused oil for hair care, the final step is to wash your hair and bask in the results of your dedicated efforts.
Follow these steps to wash your hair and fully embrace the benefits of the nourishing elixir you’ve created:
Washing Your Hair:
Gentle Shampoo: Begin by using a gentle, sulfate-free shampoo to wash your hair. This helps to remove any residual oil while maintaining the natural balance of your scalp.
Lather and Rinse: Massage the shampoo into your hair and scalp, creating a rich lather. Thoroughly rinse your hair until the water runs clear.
Condition: Apply a nourishing conditioner to the lengths of your hair, focusing on the ends. Let the conditioner sit for a couple of minutes to ensure deep hydration.
Rinse Again: Rinse your hair with cool water to seal the hair cuticles and enhance shine. Make sure all the conditioner is thoroughly rinsed out.
Feel the Transformation and Enjoy the Benefits
After washing and conditioning, you’ll immediately notice the softness, smoothness, and enhanced shine that the rosemary-infused oil has brought to your hair.
Regular use of rosemary-infused oil can lead to stronger, healthier hair, reduced hair loss, and improved overall hair condition. You may also experience a refreshed scalp and reduced dandruff.
Frequency of Use: For optimal results, consider using the rosemary-infused oil treatment 1-2 times a week. Consistency is key to experiencing the full benefits over time.
Tips to Check for Precautions and Allergies

While using rosemary-infused oil for hair care can be a delightful and beneficial experience, it’s important to be aware of potential precautions and the possibility of allergies. Here are some considerations to ensure a safe and enjoyable journey:
1. Patch Test: Before applying the rosemary-infused oil to your scalp and hair, perform a patch test on a small area of skin, like the inner forearm. This helps identify any potential allergic reactions or sensitivities.
2. Essential Oils Sensitivity: If you’re adding essential oils to your infused oil, be aware that some people may be sensitive or allergic to certain essential oils. Start with a low concentration and observe any adverse reactions.
3. Consultation: If you have a pre-existing medical condition, sensitive skin, or are pregnant, consult a healthcare professional or dermatologist before using rosemary-infused oil.
4. Avoid Contact with Eyes: Take care to avoid getting the oil in your eyes, as it may cause irritation. If contact occurs, rinse thoroughly with water.
5. Discontinue Use: If you experience any redness, itching, burning, or other discomfort after using the oil, discontinue use immediately and consult a healthcare professional if needed.
6. Allergic Reactions: Allergic reactions to rosemary are rare, but they can occur. If you experience itching, swelling, hives, or difficulty breathing after using the oil, seek medical attention promptly.
7. Cautious Application: When massaging the oil into your scalp, apply gently and avoid excessive pressure, especially if your scalp is sensitive.
8. Carrier Oil Sensitivity: While carrier oils like coconut oil are generally well-tolerated, individuals with nut allergies should avoid oils derived from nuts, such as sweet almond oil.
9. Sun Sensitivity: Some essential oils can increase sun sensitivity. If you’ve used an essential oil in your infused oil and plan to spend time in the sun, consider protecting your skin and hair from excessive sunlight.
10. Storage and Freshness: Store your infused oil in a cool, dark place to maintain its potency. If you notice any changes in color, texture, or odor, discard the oil.
Being informed and attentive to potential precautions and allergies ensures that your experience with rosemary-infused oil is safe, pleasant, and beneficial.
With careful consideration and a patch test, you can enjoy the multitude of benefits this natural elixir offers for your hair care journey.
People Also Ask (FAQs)
Question 1. How do you make Rosemary Hair Oil at Home?
Answer: Create a luxurious hair care ritual at home with DIY rosemary hair oil. Gather fresh rosemary leaves, infuse them in your chosen carrier oil, and let nature work its magic. This aromatic elixir nourishes strengthens, and revitalizes your hair, unveiling the secrets to gorgeous locks.
Question 2. Can you make Homemade Rosemary Oil for Hair Growth?
Answer: Unlock the potential of natural remedies with homemade rosemary oil for hair growth. Harness the power of rosemary’s nutrients by infusing it in a carrier oil, and experience the wonders of a holistic approach to hair care. Discover a simple, effective path to stronger, longer locks.
Question 3. How do you Mix Rosemary Oil for Hair Growth?
Answer: Elevate your hair care routine with the art of mixing rosemary oil for hair growth. Combine rosemary essential oil with carrier oil like coconut or jojoba, and experience a potent blend that stimulates circulation, promotes follicle health, and nurtures your journey to fuller, healthier hair.
Question 4. What Happens if you don t Dilute Rosemary Oil before Putting it in your Hair?
Answer: Skipping dilution of rosemary oil before hair application can lead to scalp irritation and sensitivity. Dilution ensures a safe and effective experience, harnessing rosemary’s benefits without any adverse effects.
Question 5. How fast will my Hair Grow with Rosemary Oil?
Answer: The rate at which your hair grows can vary based on factors like genetics, overall health, and care routine. While rosemary oil may stimulate hair growth by promoting scalp health and improving blood circulation, individual results can vary. Regular use and a holistic approach to hair care can contribute to healthier, potentially faster-growing hair over time.
Question 6. How do you Make 100% Pure Rosemary Oil?
Answer: Crafting 100% pure rosemary oil involves distilling the rosemary herb to extract its essential oil. This meticulous process captures the concentrated essence, offering a versatile solution for hair, skin, and aromatherapy needs.
Question 7. What is the best Carrier Oil for Rosemary Oil?
Answer: The ideal carrier oil for rosemary oil infusion depends on your hair type: olive oil suits most, coconut deeply nourishes, and jojoba balances oily scalps. Tailor your choice to achieve the best results for your hair’s needs.
Question 8. Is it okay to put just Rosemary Oil in your Hair?
Answer: Using only pure rosemary oil on your hair might lead to irritation. Diluting it with carrier oil not only ensures safe application but also enhances absorption, allowing its beneficial properties to flourish.
Question 9. Can I Spray Rosemary water on my Hair Every day?
Answer: Spraying rosemary water on your hair daily can provide a refreshing and fragrant experience, but it’s important to avoid excessive use. Overdoing it might lead to scalp dryness or irritation. Consider using it a few times a week for optimal results and a gentle boost to your hair care routine.
Conclusion
As you’ve learned, the combination of rosemary’s therapeutic prowess and the nourishing embrace of carrier oils, particularly coconut oil, presents a potent elixir that nurtures your hair from root to tip.
This approach to hair care takes you beyond commercial products and connects you with age-old remedies that harness the power of nature. T
The benefits of rosemary-infused oil extend beyond mere aesthetics, promoting healthy hair and a revitalized scalp.
Whether you’re seeking to enhance hair growth, strengthen follicles, reduce hair loss, or simply indulge in a soothing self-care ritual, this elixir has something to offer for everyone.
As you immerse yourself in the world of rosemary-infused oil, remember to personalize your elixir with optional additions like essential oils. These touches not only elevate the sensory experience but also bring added benefits tailored to your hair’s unique needs.
Disclaimer
The information provided in this guide on making rosemary oil for hair is intended for educational purposes only. It is not a substitute for professional medical advice, diagnosis, or treatment. Always perform a patch test before using any new products on your skin or hair, and consult a healthcare professional or dermatologist if you have any pre-existing medical conditions or concerns. The use of rosemary-infused oil and any optional additions is at your own risk, and individual results may vary.